This guide provides the technical steps that a Course Manager, or other
organization Administrator, would follow to administer digital moderated and
unmoderated courses as part of CCL Passport. This includes things like setting up
course sessions in the CCL Leadership Accelerator platform, registering
participants, “committing” the session, and tracking participant progress. A printable version of this guide is available for download at the bottom of the page.
Access Enrollment Module
• If you are new to CLA, you will receive an invitation to activate your account.
• After you receive your invitation and log into CLA, you will be able to access courses you are
personally enrolled in as a participant the same as your own participants.
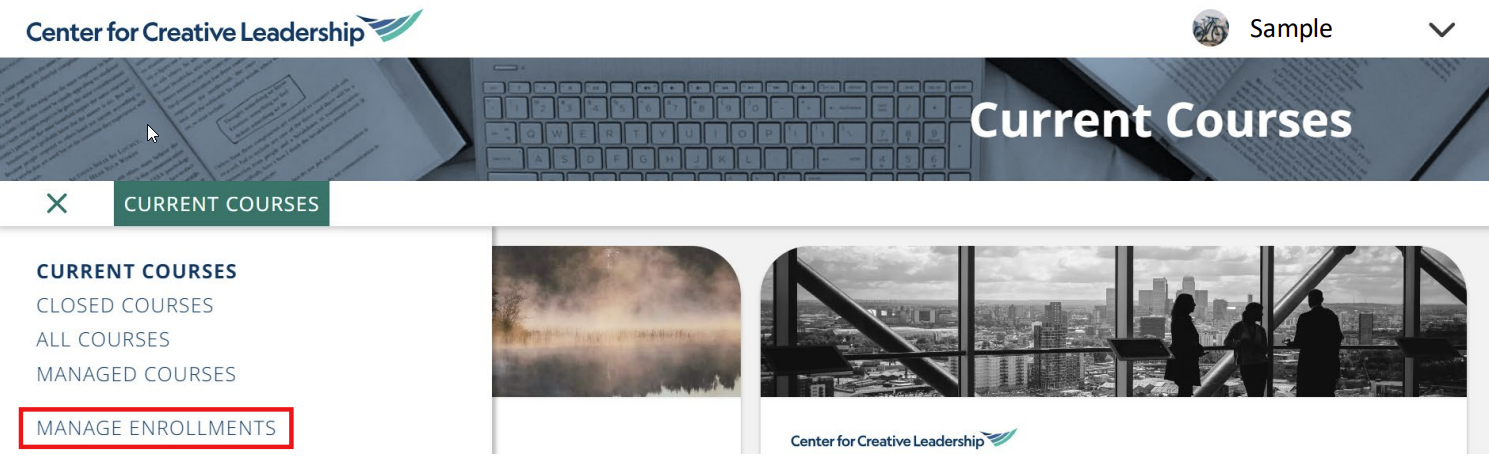
• In addition to any courses you may already have access to in CLA as a participant, you will now
see the Manage Enrollments option displayed in the expanded menu beside current courses on
the left side of your screen, which is where you can access your available CCL Passport courses,
as an organization Administrator.
• After you receive your invitation and log into CLA, you will be able to access courses you are
personally enrolled in as a participant the same as your own participants.
• In addition to any courses you may already have access to in CLA as a participant, you will now
see the Manage Enrollments option displayed in the expanded menu beside current courses on
the left side of your screen, which is where you can access your available CCL Passport courses,
as an organization Administrator.
1. Access Inventory
• After your order is complete, you will be able to access your inventory via our CCL Leadership
Accelerator (CLA) learning platform.
• If you are new to CLA, you will receive an invitation to activate your account.
• Email confirmations are sent for all orders verifying when inventory has been added.
• In addition to any courses you may already have access to in CLA, you will now see the Manage
Enrollments option displayed in the expanded menu beside current courses on the left side of
your screen, which is where you can access your inventory.
2. Create a Session
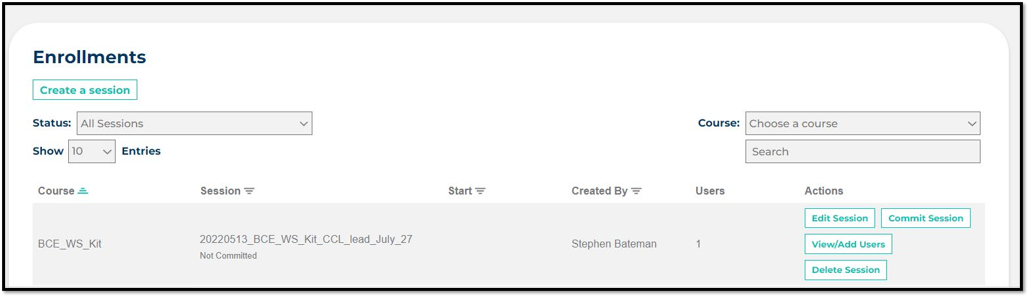
• The top section, Available Seats, allows you to see your total available seats, used seats, and
remaining seats.
• The Create a session button to the right of each course allows you to set up a new session. On
that screen, you will be asked to name your session (part of the name will be auto generated
to ensure no duplicate sessions are created) and select the inventory item/course you would like
to include in the session.

• At this point, sessions are not active and any participants you add in the next step will not get an
invite until the session has been committed, shown in a later step.
• As the administrator setting up the course you will automatically be enrolled in the session with
the sponsor role. Any administrators supporting your course will also need to be set up with
the Sponsor role which gives them the ability to see the full course and session reports. You have
up to 4 Sponsor seats per session including the one sponsor seat automatically assigned to the
person creating the session (these seats do not deduct from your inventory, and you should
not remove yourself/sponsor from the session).
• Learner = Participant
• Sponsor = Course Manger/Administrator
remaining seats.
• The Create a session button to the right of each course allows you to set up a new session. On
that screen, you will be asked to name your session (part of the name will be auto generated
to ensure no duplicate sessions are created) and select the inventory item/course you would like
to include in the session.
• At this point, sessions are not active and any participants you add in the next step will not get an
invite until the session has been committed, shown in a later step.
• As the administrator setting up the course you will automatically be enrolled in the session with
the sponsor role. Any administrators supporting your course will also need to be set up with
the Sponsor role which gives them the ability to see the full course and session reports. You have
up to 4 Sponsor seats per session including the one sponsor seat automatically assigned to the
person creating the session (these seats do not deduct from your inventory, and you should
not remove yourself/sponsor from the session).
• Learner = Participant
• Sponsor = Course Manger/Administrator
3. Enroll Participants
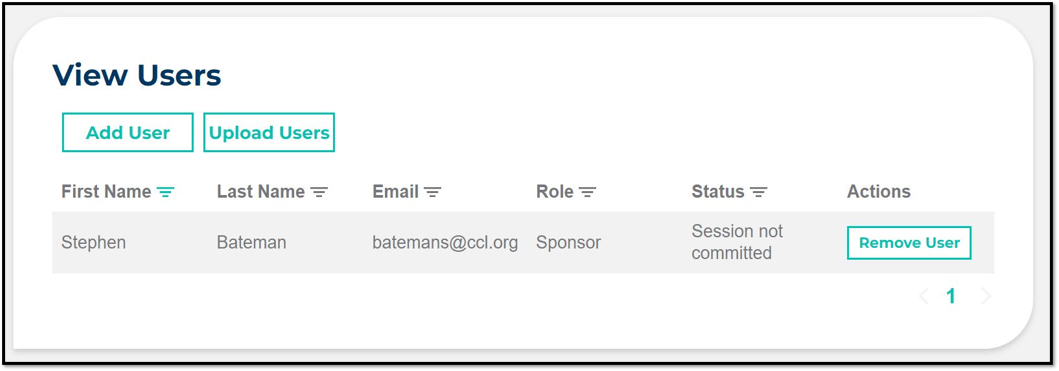
• The lower half of the Enrollments screen allows you to add users to sessions you have created.
To enroll participants, first go the View/Add Users link next to your session. From that screen
there are two options:
• Click Add User to add individual users manually by selecting the role (learner for participants)
and entering the name and email.
Or…
• Click Upload Users and then select the role of the users to be uploaded and Download
Template to utilize the appropriate batch-upload template. Enter participant information in the
file and then return to the Upload Users page and click Choose File. Select your saved template
to add all participants at once.
 You can remove and add additional participants by returning to the View/Add Users Screen.
• The remove user option and remove session buttons remain available until the session is
committed. Once committed the session can no longer be removed, but users can be removed
if they have not already accessed their link/logged in for the first time.
• You can continue to add users even after committing the session and they will get their
invitation immediately. Their access end term will be the same as those originally committed
in the session (180 days from commit date).
To enroll participants, first go the View/Add Users link next to your session. From that screen
there are two options:
• Click Add User to add individual users manually by selecting the role (learner for participants)
and entering the name and email.
Or…
• Click Upload Users and then select the role of the users to be uploaded and Download
Template to utilize the appropriate batch-upload template. Enter participant information in the
file and then return to the Upload Users page and click Choose File. Select your saved template
to add all participants at once.
You can remove and add additional participants by returning to the View/Add Users Screen.• The remove user option and remove session buttons remain available until the session is
committed. Once committed the session can no longer be removed, but users can be removed
if they have not already accessed their link/logged in for the first time.
• You can continue to add users even after committing the session and they will get their
invitation immediately. Their access end term will be the same as those originally committed
in the session (180 days from commit date).
4. Launch a Session
• To launch a session and send participant invitations, select Commit Session. You will have the
option to launch invitations immediately or select a future send time/date. Participants will have
a set access term from the Commit date. (180 days from commit date).
• To edit a session, select Edit Session. This button is only available before a session is committed
and only allows for a session name or course change.
5. Checking Status
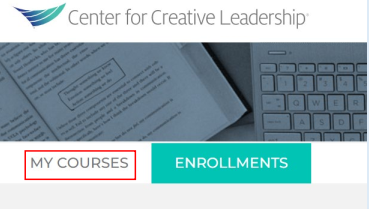
• After a session is launched, the Administrator that created the session and any assigned Course
Managers/Sponsors will also gain access to the course under My Courses which can be navigated
to in the top left corner of the main enrollments page.
• If you have multiple active sessions, a drop down for Select Grouping will allow you to select
your specific session for any given course. You can then select continue for that course and see
everything a participant would see in that course.
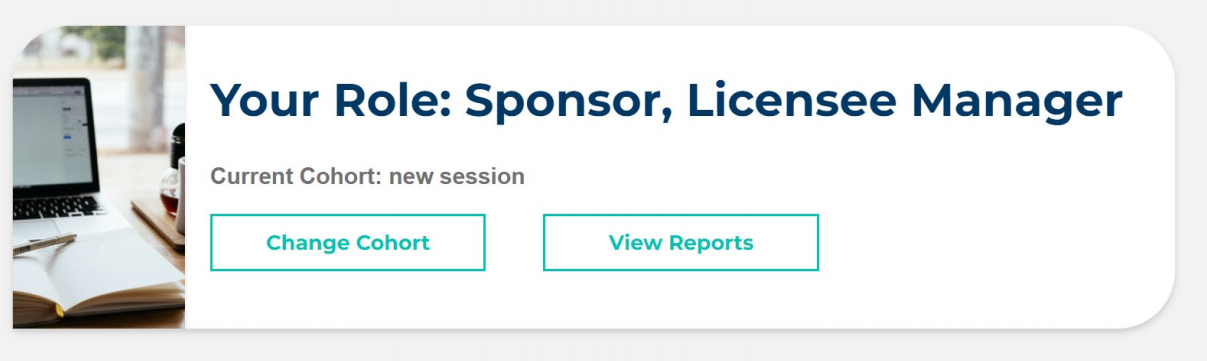
• Once in your course session, an additional role module will be available to session Sponsors near
the top of the page. The View Reports button will allow you to view multiple reports on your
participants’ activity and completion. The option to resend invitations is located under the
student activity report.
• At some screen resolutions it may be necessary to scroll to the far right to access the button for
resending participant invitations.
Managers/Sponsors will also gain access to the course under My Courses which can be navigated
to in the top left corner of the main enrollments page.
• If you have multiple active sessions, a drop down for Select Grouping will allow you to select
your specific session for any given course. You can then select continue for that course and see
everything a participant would see in that course.
• Once in your course session, an additional role module will be available to session Sponsors near
the top of the page. The View Reports button will allow you to view multiple reports on your
participants’ activity and completion. The option to resend invitations is located under the
student activity report.
• At some screen resolutions it may be necessary to scroll to the far right to access the button for
resending participant invitations.
Before and After Launch
• Before Committing/Launching a session, it is key to communicate to your participants that they
will receive an email invitation to the CLA platform.
• The administrator should also share with the participants of workshop kits* that they may have
some light pre-work, such as a self-assessment, but in most cases they will only need to enter
the system and read through the course info page and “prepare” tile of their course. In the prepare
tile of each participant kit, there will be instructions for participants to download their course
materials for use during the live portion of the workshop.
• Post workshop they should return to the course and explore the “apply” tile for additional
support reading and tools.
• Full and multi-day programs such as Better Conversations Every Day™and Lead 4 Success®
generally have a different layout that is covered in the certification process with
Facilitators/Trainers.